
This post is about to make Steam for Linux to run optimally in a nVidia Optimus enabled computer running a 64bits Ubuntu 12.04 LTS OS.
In my case I’m using a Dell XPS 15z with a nVidia GeForce GT 525M.
This tutorial assumes a clean install. You should NOT install the nVidia driver directly.
Updated to Steam built «Jan 08 2013».
Table Of Contents:
Install Bumblebee
First step is to make Optimus work. We will use a Software called Bumblebee for that.
1) Install Bumblebee and the nVidia propietary driver
sudo add-apt-repository ppa:bumblebee/stable
sudo add-apt-repository ppa:ubuntu-x-swat/x-updates
sudo apt-get update
sudo apt-get install bumblebee bumblebee-nvidia
Commands explained:
- Add Bumblebee PPA (Personal Package Archive) to Ubuntu so you can download Bumblebee.
- Add the drivers updates PPA so you can download the lastest nVidia driver.
- Update the repository index with the two newly added sources.
- Install Bumblebee and the package to support nVidia Optimus using the proprietary nVidia driver.
3) Test Bumblebee
glxspheres
You should get something like this:
OpenGL Renderer: Mesa DRI Intel(R) Sandybridge Mobile
58.335930 frames/sec - 56.737059 Mpixels/sec
57.184303 frames/sec - 55.616995 Mpixels/sec
That is, you are rendering some graphics using the low power video card. Now:
optirun glxspheres
You should get something like this:
OpenGL Renderer: GeForce GT 525M/PCIe/SSE2
108.236036 frames/sec - 105.269502 Mpixels/sec
111.096688 frames/sec - 108.051750 Mpixels/sec
115.719165 frames/sec - 112.547535 Mpixels/sec
That is, you are now rendering some graphics using the high power video card.
Install Primus
The problem with optirun is the use of VirtualGL. VirtualGL has a huge overhead and thus impact on the performance. For a more technical description check this link: http://www.webupd8.org/2012/11/primus-better-performance-and-less.html
There is another alternative: Primus. Primus runs on top of Bumblebee and improves performance a lot.
1) Install Primus
sudo add-apt-repository ppa:zhurikhin/primus
sudo apt-get update
sudo apt-get install primus
Commands explained:
- Add Primus PPA (Personal Package Archive) to Ubuntu so you can download it.
- Update the repository index with the newly added sources.
- Install Primus.
2) Test Primus
vblank_mode=0 primusrun glxspheres
You should get something like this:
OpenGL Renderer: GeForce GT 525M/PCIe/SSE2
214.447849 frames/sec - 208.570262 Mpixels/sec
220.159208 frames/sec - 214.125085 Mpixels/sec
220.226968 frames/sec - 214.190987 Mpixels/sec
Yeah. That’s a huge performance boost.
(Optional) Install nVidia experimental drivers 310
This are supposed to even double the performance of the nVidia card.
1) Install new driver
sudo apt-get install nvidia-experimental-310 nvidia-settings-experimental-310
3) Test new driver
vblank_mode=0 primusrun glxspheres
You should get something like this:
OpenGL Renderer: GeForce GT 525M/PCIe/SSE2
272.052255 frames/sec - 264.595847 Mpixels/sec
270.377649 frames/sec - 262.967139 Mpixels/sec
270.206138 frames/sec - 262.800328 Mpixels/sec
Yeah. That’s another huge performance boost.
Install Steam
1) Install Downloader
wget http://media.steampowered.com/client/installer/steam.deb
sudo apt-get install gdebi-core
sudo gdebi steam.deb
Commands explained:
- Download oficial Steam downloader package.
- Install GDebi to handle dependencies of local Debian packages.
- Install the Steam downloader.
2) Run Steam
Well, do that. Steam will download and install the real Steam client in the
folder ~/.local/share/Steam.
3) Temporaly fix bug #312 «Failed to load steamui.so»
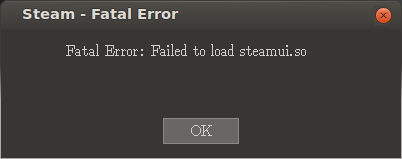
This seem to happen on every 64bits OS. Full bug report here:
https://github.com/ValveSoftware/steam-for-linux/issues/321
Solution:
sudo nano /etc/ld.so.conf.d/steam.conf
Add next two lines to file:
/usr/lib32
/usr/lib/i386-linux-gnu/mesa
Then execute:
sudo ldconfig
Now you should be able to run Steam. Login with your account, confirm the new computer, etc, etc. Close Steam: Steam > Exit.
Install Flash for Steam
- Make sure you have
libxt6:i386 installed.
- Go to your Home folder, unhide hidden files (Ctrl-H) and go to
.local/share/Steam/ubuntu12_32/.
- Create a folder called «plugins».
- Download Flash player plugin for Linux 32bits from:
http://get.adobe.com/flashplayer/otherversions/
- Select the «.tar.gz» download. Open the downloaded file and extract file called
libflashplayer.so to the plugins folder created before.
This will make Flash movies in the store work, but slow as hell in some situations.
In commands:
sudo apt-get install libxt6:i386
mkdir -p ~/.local/share/Steam/ubuntu12_32/plugins
wget -qO- https://get.adobe.com/de/flashplayer/completion/?installer=Flash_Player_11.2_for_other_Linux_%28.tar.gz%29_32-bit | awk -F\' '/location.href/{print $2}'| sed s/http:/https:/ | wget -i- -qO- | tar zxvC ~/.local/share/Steam/ubuntu12_32/plugins libflashplayer.so
(Thanks to user Kano from the Steam forums and Alessio Gaeta for those commands).
Test that videos are working. Again close Steam: Steam > Exit.
(Optional) Move Steam library to another partition/HD
If like me you have a hard drive or partition specific for Steam or multimedia, you can move your Steam installation and games to that drive. To do so:
Move the library and installation folder
mv ~/.local/share/Steam /media/<your-device>/Steam
In my case:
mv ~/.local/share/Steam /media/Black/GNU-Linux/Steam
Create symbolic links
cd ~/.local/share/
ln -s /media/<your-device>/Steam/ .
Now try restarting Steam.
If you want to have the Steam library on a NTFS partition make sure that the volume is being mounted with your uid and gid AND files needs to be executable by you or your group, if not, Steam will not even start, and if starts, some games will not work.
If you are getting the dialog that Steam cannot find the library and you have an NTFS partition this should be the main cause.
Note: If setting the execution bit for all the files is too much for you, you can configure the NTFS partition to allow POSIX permissions like ext2/3/4. Is much more advanced (not that much), for more information about this option see:
For removable devices
To configure those settings to ONLY that drive and partition, install the utility udisks-glue and configure it:
sudo apt-get install udisks-glue
nano ~/.udisks-glue.conf
And put:
filter steam {
    optical = false
    partition_table = false
    usage = filesystem
    type = ntfs
    uuid = 40DC5EC613CFD8EB
}

match steam {
    automount = true
    automount_options = { 'dmask=000', 'fmask=000' }
}
Change the uuid token with the UUID of your drive. To know it type once is mounted:
sudo blkid
Finally make udisks-glue to start when the user logs in:
nano ~/.config/autostart/udisks-glue.desktop
And put:
[Desktop Entry]
Type=Application
Name=udisks-glue
Exec=udisks-glue
Comment=udisks-glue is a daemon that can perform user-configurable actions when a certain udisks event is detected
X-GNOME-Autostart-enabled=true
Note: Thas was tested on a NTFS USB 3.0 attached 7200rpm/32MB 3Gbps 1TB drive. My laptop has a 256GB internal SSD.
For static devices
Just edit the file /etc/fstab like this:
UUID=40DC5EC613CFD8EB /media/Black ntfs-3g defaults,uid=1000,gid=1000,dmask=000,fmask=000 0 0
Change the UUID and the mount point. To know them type once is mounted:
sudo blkid
Run Steam games using Primus
As you may have deducted, when you run Steam you’re running it with the low power graphics card. You can launch Steam with your high power graphic card using primusrun:
primusrun steam
This is only useful if you’re planning to use the Big Picture Mode. If not, don’t, is not necessary at all. What is absoluty necessary is to run some games with your high power nVidia graphics card. To do so, do the following.
(Relatively official instructions from http://steamcommunity.com/app/221410/discussions/6/846939854395110175/)
1) Add the OPTIMUS_PREFIX variable to your environment
sudo sh -c 'echo OPTIMUS_PREFIX=\"primusrun\" >> /etc/environment'
2) Logout and login from you session
Seriously. Desktop session, not Steam session. Steam is closed.
For each game you want to launch using you high powered nVidia card do:
- Select a game from the Library page of the Steam client, right-click, and
select Properties.
- Click the
SET LAUNCH OPTIONS button and specify $OPTIMUS_PREFIX %command%
for the command line.
- Save your changes.
